




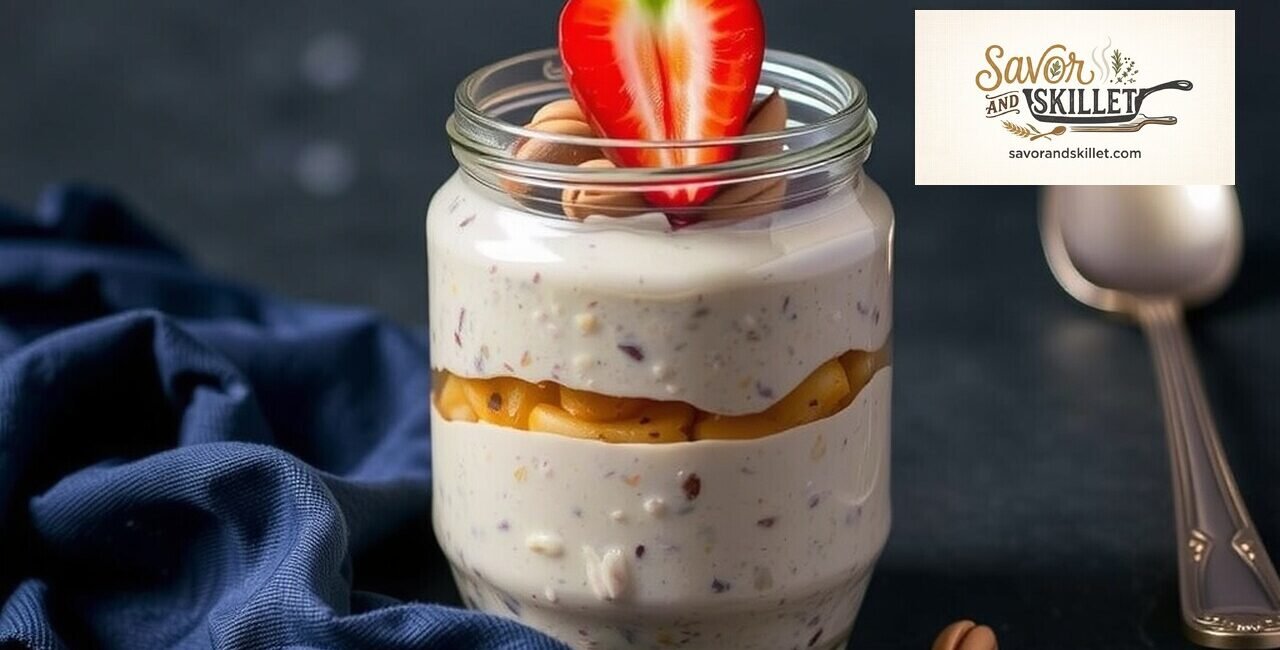
If you are looking for a breakfast solution that eliminates the morning rush, overnight oats might just become your new kitchen staple. By combining simple pantry ingredients the night before, you allow the oats to hydrate and soften, resulting in a creamy, chilled, and nutritious meal ready the moment you open the refrigerator. At Savor and Skillet, we find that the versatility of this method is what keeps home cooks coming back, especially as we head further into 2026. Whether you are a meal-prep enthusiast or just someone who hates cooking before your first cup of coffee, mastering overnight oats is a foundational skill. Let’s dive into how you can perfect this process for your own morning routine.
What Are Overnight Oats?
Overnight oats are a no-cook preparation of raw rolled oats soaked in a liquid, such as dairy or plant-based milk, for several hours or overnight. This process replaces traditional stove-top cooking by allowing the oats to absorb the moisture, resulting in a tender, porridge-like texture that is refreshing, convenient, and incredibly easy to customize with various toppings or mix-ins.
Essential Ingredients and Prep
Now that we have defined what this breakfast staple is, let’s look at the components you need to get started. Success here relies on the ratio of liquid to grain, which is why having a clear plan is essential for consistency.
Recipe Overview
- Servings: 1
- Prep time: 5 minutes
- Soak time: 4–8 hours (overnight)
- Total time: 8 hours, 5 minutes
- Difficulty: Very Easy
Ingredients List
- 1/2 cup rolled oats (old-fashioned, not steel-cut or instant)
- 1/2 cup milk of choice (almond, oat, soy, or dairy)
- 1/4 cup Greek yogurt (adds creaminess and structure)
- 1 tablespoon chia seeds (crucial for achieving a pudding-like consistency)
- 1 teaspoon maple syrup or honey (optional sweetener)
- 1/4 teaspoon vanilla extract
- A pinch of salt (to balance the flavors)
When selecting your ingredients, keep in mind that the type of oats makes a significant difference. Rolled oats offer the best texture—they soften enough to be creamy but maintain a slight chew. Steel-cut oats remain too tough even after long soaking, while instant oats tend to become mushy and unappealing. Regarding your liquid choice, high-protein plant milks, such as soy, tend to thicken slightly better than thin nut milks. If you have any allergies, swapping in sunflower seed butter or gluten-free certified oats is a straightforward adjustment that doesn’t compromise the final structure.
How to Make Overnight Oats
With the ingredients gathered, we can move directly into the assembly process. Precision here ensures you don’t end up with a watery mess or a clumped-up paste in the morning.
- Combine the Base: In a glass jar or a food-safe container with a tight-fitting lid, add the rolled oats, chia seeds, and the pinch of salt. Stir briefly to ensure the seeds are evenly distributed among the oats.
- Add Liquids and Sweetener: Pour in the milk, Greek yogurt, vanilla extract, and your chosen sweetener.
- The Critical Mix: Using a spoon, stir the mixture vigorously for at least 30 seconds. Because chia seeds tend to sink or clump, you must ensure they are fully incorporated into the liquid.
- Seal and Chill: Secure the lid tightly and place the container in the refrigerator. The mixture needs at least 4 hours to reach the ideal texture, though 8 hours—or an overnight soak—is optimal.
- Assess Doneness: When you remove the jar in the morning, the mixture should have thickened significantly. The oats should be tender to the bite, and the liquid should be fully absorbed, creating a thick, creamy consistency. If it looks too dry, stir in an extra splash of milk before serving.
I Found a video too for you guys, this video is so easy to do! here you go:
Chef Tips for Texture and Flavor
Now that you know how to make overnight oats using the standard ratio, let’s discuss how to elevate the experience through technique. Many beginners worry about the “mush factor,” but this is entirely manageable if you respect the resting time and ingredient ratios.
One common mistake is failing to incorporate enough fat or protein. If your oats feel “thin,” it is often because you omitted the yogurt or used a low-fat milk that lacks the necessary viscosity. Additionally, if you find that you prefer a warm breakfast, you can safely heat your prepared oats in the microwave for 30–60 seconds in the morning. Just be sure to use a microwave-safe bowl, as the glass jars often used for soaking can become dangerously hot or, in some cases, shatter if they aren’t tempered.
For those interested in deep flavor profiling, Savor and Skillet recommends experimenting with “layering.” Instead of mixing fruits into the oats the night before, place firmer items like apple chunks or berries in a separate compartment or on top in the morning. This prevents the fruit from becoming overly saturated and maintains a better textural contrast between the crunchy fruit and the soft grains.
Advanced Customization and Pairings
Since we have touched on techniques to improve your texture, let’s explore how to customize your base recipe to keep your breakfast routine exciting. The beauty of this dish lies in its neutrality; it is effectively a blank canvas for culinary creativity.
In 2026, we are seeing a rise in savory flavor profiles. If you want to move away from the traditional cinnamon and fruit approach, try adding a tablespoon of savory pesto or a sprinkle of toasted seeds and a dash of olive oil. For those sticking to sweet, the combination of almond butter with shredded coconut and a pinch of cardamom is a personal favorite. If you are tracking nutrients, adding a scoop of your favorite protein powder is common, but be aware that it will thicken the oats significantly, requiring an extra splash of milk to compensate. According to data from food science trends in 2026, using high-fiber mix-ins like ground flaxseed can further enhance the nutritional density of your breakfast without altering the flavor profile.
Storage and Safety Standards
Building on that foundation of variety, we must address the logistics of storage. Because this is a raw preparation, food safety is just as important as the flavor, so it is vital to keep your food preparation area clean and your temperatures monitored.
Your oats will keep safely in the refrigerator for up to 5 days, though the quality is best if consumed within 3 days. To maintain freshness, always use an airtight container. If you notice any “off” smells or if the liquid appears separated and cloudy after just a day, this is a clear sign that your milk may have been near its expiration date. Always use clean utensils when scooping out servings; double-dipping from the jar can introduce bacteria that will accelerate spoilage. If you plan on meal prepping for the whole week, I suggest making individual portions in separate containers. This avoids the need to repeatedly open and expose a large batch to the air, which helps maintain the integrity of the texture until your very last serving.
Frequently Asked Questions About Overnight Oats
Since you now understand the storage and prep nuances, here are the answers to the most common questions regarding this method.
Can you freeze overnight oats?
Yes, you can freeze them for up to three months, though the texture may change slightly upon thawing. It is best to thaw them overnight in the refrigerator before eating, and you may need to add a splash of fresh milk to restore the creaminess.
Do I have to use chia seeds?
You don’t strictly have to, but they are highly recommended for the best texture. Chia seeds act as a thickening agent; without them, your oats may remain quite liquidy, so you would need to reduce the amount of milk used in the recipe.
Are overnight oats healthy for digestion?
Generally, yes, as the soaking process makes the starches in the oats easier to digest. However, individual sensitivity to fiber varies, so if you are new to high-fiber diets, start with smaller portions to see how your body adjusts.
Can I use steel-cut oats instead of rolled oats?
It is not recommended because steel-cut oats require significant cooking to soften. If you attempt to use them, they will likely remain very chewy and hard, even after an overnight soak, which many people find unpleasant.
Should I add toppings before or after soaking?
Add crunchy toppings, such as nuts or seeds, immediately before serving to maintain their texture. Soft toppings, like dried fruit, can be added either the night before or in the morning, as they will hydrate during the soak.
We’ve covered the entire journey—from understanding the basic ratio to mastering texture and troubleshooting common prep mistakes. The most important takeaway is that your overnight oats are meant to be a flexible, low-stress part of your morning. Once you have the formula down, you’ll find that it frees up your morning for things that matter more than standing over a stove. If you enjoyed this guide, try experimenting with your own flavor combinations this week—and don’t forget to check back at Savor and Skillet for more 2026 kitchen hacks. Happy prepping!

Other Articles

Classic Spaghetti Carbonara Without Scrambled Eggs
Easy Shakshuka Recipe with Step-by-Step Instructions

No Comment! Be the first one.