





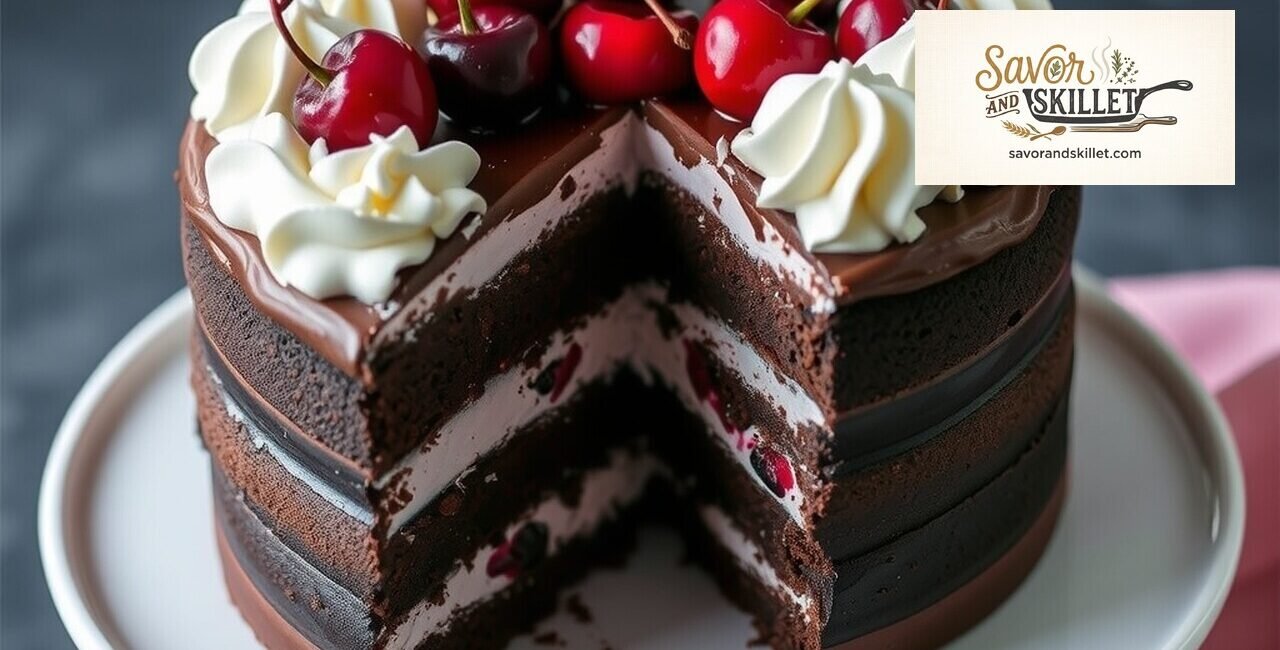
There is perhaps no dessert more iconic in the world of German baking than the classic Black Forest Cake. With its striking contrast of deep, cocoa-rich sponge, ethereal whipped cream, and tart, macerated cherries, this masterpiece is a staple for celebrations and elegant gatherings. If you have been searching for a reliable method to create this at home, our guide here at Black Forest Cake provides the technical foundation you need. As we look at the baking trends of 2026, the focus remains on balancing rich, dark chocolate profiles with the natural brightness of stone fruits. Whether you are a seasoned baker or simply looking to impress guests, understanding the interplay of these textures is the secret to a successful bake.
Also Read: How to Make Turkey Pot Pie: Recipe and Instructions
What Exactly is Black Forest Cake?

Black Forest Cake is a traditional German dessert, known as Schwarzwälder Kirschtorte, consisting of multiple layers of chocolate sponge cake sandwiched with whipped cream and cherries. It is traditionally finished with a generous coating of whipped cream, chocolate shavings, and maraschino or sour cherries. The defining flavor profile relies on the contrast between the bitterness of high-quality cocoa and the sweetness of the cream, often heightened by a cherry-based spirit like Kirschwasser.
The beauty of this dessert lies in its structural integrity. Unlike modern cakes that rely on overly dense buttercreams, the traditional version uses fresh heavy cream, which provides a light, airy mouthfeel. When you manage the balance between the moisture of the cherries and the aeration of the sponge, you achieve a sophisticated result that has remained a gold standard in pâtisserie for decades.
Ingredients for Your Black Forest Cake
Now that we have established what makes this dessert so special, let’s move on to something equally important: the specific components and tools required for success. A great easy Black Forest cake recipe relies on precision, so ensure your ingredients are at room temperature before you begin.
Quick Stats:
- Servings: 12 slices
- Prep Time: 45 minutes
- Cook Time: 35 minutes
- Total Time: 1 hour 20 minutes (plus cooling time)
- Difficulty: Intermediate
For the Chocolate Sponge:
- 1 ¾ cups all-purpose flour
- 2 cups granulated sugar
- ¾ cup unsweetened cocoa powder (Dutch-processed is preferred for a deeper color)
- 1 ½ teaspoons baking powder
- 1 ½ teaspoons baking soda
- 1 teaspoon salt
- 2 large eggs (room temperature)
- 1 cup whole milk
- ½ cup vegetable oil
- 2 teaspoons vanilla extract
- 1 cup boiling water
For the Cherry Filling & Assembly:
- 2 cans (15 oz each) pitted sour cherries in water
- ½ cup granulated sugar
- 3 tablespoons cornstarch
- 2 tablespoons Kirschwasser (optional, or cherry juice)
- 3 cups heavy whipping cream (chilled)
- ½ cup powdered sugar
- Shaved dark chocolate (for garnish)
When selecting your cocoa powder, note that Dutch-processed cocoa reacts differently with leavening agents than natural cocoa. Since we are using a combination of baking powder and baking soda, this specific ratio ensures the rise is consistent and the crumb remains tender.
How to Make Black Forest Cake
Since you now understand the necessary ingredients, here is how the preparation connects—and why a systematic approach to the mixing process matters just as much as the quality of your cocoa. Follow these steps carefully to ensure your Black Forest Cake achieves that perfect structure.
- Preheat and Prep: Preheat your oven to 350°F (175°C). Grease and flour two 9-inch round cake pans. For an extra layer of insurance, line the bottoms with parchment paper to prevent sticking.
- Dry Ingredients: In a large mixing bowl, sift together the flour, sugar, cocoa powder, baking powder, baking soda, and salt. Sifting is crucial here to remove lumps from the cocoa, which can otherwise create bitter pockets in your sponge.
- Wet Ingredients: Add the eggs, milk, oil, and vanilla to the dry mixture. Beat on medium speed with an electric hand mixer for about two minutes. The batter should look smooth and glossy.
- The Boiling Water Technique: Carefully stir in the boiling water by hand. The batter will be very thin; this is intentional. The heat from the water helps “bloom” the cocoa, releasing a more intense chocolate flavor.
- Baking: Pour the batter evenly into the prepared pans. Bake for 30 to 35 minutes. Test for doneness by inserting a toothpick into the center; it should come out clean or with just a few moist crumbs attached.
- Cherry Filling Prep: While the cakes cool, drain the cherries, reserving about ½ cup of juice. In a small saucepan, combine the cherries, sugar, cornstarch, and reserved juice. Cook over medium heat, stirring constantly, until the mixture thickens and becomes glossy. Remove from heat and stir in the Kirschwasser if using. Allow to cool completely.
- Whipping the Cream: In a chilled bowl, beat the heavy cream and powdered sugar on high speed until stiff peaks form. Be careful not to over-whip, or the cream will turn into butter.
- Assembly: Once the cakes are entirely cool, place one layer on your serving plate. Pipe a ring of whipped cream around the edge to create a “dam,” then fill the center with the cooled cherry mixture. Top with the second cake layer, frost the entire exterior with the remaining whipped cream, and decorate with chocolate shavings and extra cherries.
Layers of rich, moist chocolate sponge cake paired with fresh cherries, smooth whipped cream, and a generous dusting of chocolate shavings—the Black Forest Cake is a classic masterpiece guaranteed to delight the palate while providing a sweet, spirit-lifting energy boost. I am sharing this all-time favorite birthday and celebration cake recipe here at Savor and Skillet so you can enjoy its rich, sweet, and fruity flavor combination right from your own kitchen.
To ensure the sponge stays moist, the cream filling holds its shape without melting, and the layers look stunning, take a look at the secrets behind making it in the video tutorial I’ve included below:
Pro Tips for the Best Black Forest Cake Recipe
With the assembly instructions under your belt, learning how to master the small details makes the final presentation much easier to grasp. Let’s dig into the nuances that separate a standard dessert from a professional-grade Black Forest Cake.
First, always prioritize cooling your cakes completely before assembly. If you attempt to frost a cake that is even slightly warm, the whipped cream will lose its structure and begin to slide off the sides. If you are in a rush, utilize a wire cooling rack to encourage airflow around the entire sponge, which can cut cooling time by nearly half.
Another technical point involves the cherry filling. If your cherries are too wet, they will soak into the sponge too quickly, making the cake mushy. Always ensure your cornstarch mixture is fully thickened before moving to the assembly phase. You can verify this by checking the clarity of the syrup; when the cornstarch is fully cooked, the cherry mixture transforms from opaque to a translucent, jam-like consistency. According to baking industry standards, maintaining this starch gelatinization is key to a clean slice.
Common Mistakes and Troubleshooting
After covering the pro tips, the obvious next question is: what about the inevitable mishaps? Here is everything you need to know about navigating common pitfalls in the kitchen.
The most frequent frustration people encounter is the cake collapsing in the center. This is almost always caused by opening the oven door too early. Keep the door shut for at least the first 25 minutes of Black Forest Cake cooking time. If you notice the edges browning much faster than the center, your oven rack might be positioned too high; move the pans to the center rack for more uniform heat distribution.
If your whipped cream is not holding its shape, it is likely that the cream was not cold enough when you started whipping. Try chilling your mixing bowl in the freezer for 10 minutes before beginning the process. If it still refuses to stiffen, you may have used cream with a lower fat content; ensure you are using heavy whipping cream with at least 35% milkfat for the best results.
Frequently Asked Questions About Black Forest Cake
How can I make this recipe ahead of time?
You can bake the chocolate sponge layers up to two days in advance and keep them tightly wrapped in plastic wrap at room temperature or in the refrigerator. However, the final assembly—adding the fresh cream and cherries—should ideally be done on the day of serving to ensure the cream remains fresh and the cake texture stays light.
Is it possible to make a non-alcoholic version?
Yes, simply omit the Kirschwasser or replace it with an equal amount of cherry juice or a splash of almond extract. The flavor profile will remain delicious and authentic to the fruit-forward nature of the dessert without the specific bite of the spirit.
Why is my cake dry?
A dry cake is usually the result of over-measuring the flour or over-baking the sponge. Always use the “spoon and level” method when measuring flour to avoid packing too much into your measuring cup, and check for doneness five minutes before the recipe’s suggested maximum time.
Can I use frozen cherries instead of canned?
Absolutely, though you will need to adjust the sugar and cornstarch slightly. Frozen cherries release more liquid, so you may need to simmer the mixture for a few extra minutes to achieve the desired thick consistency for your filling.
What is the secret to perfect chocolate shavings?
The secret is to use a high-quality dark chocolate bar at room temperature and a vegetable peeler. If your kitchen is warm, chill the chocolate bar for just a few minutes, then use the peeler along the edge of the bar to create wide, delicate curls that look stunning on top of your cake.
Conclusion
We just unpacked the technical nuances of the perfect Black Forest Cake — now here’s where it gets really interesting: the flavor profile actually improves after sitting for an hour or two in the refrigerator, as the moisture from the cherries migrates into the sponge. Following these steps, from the bloom of the cocoa to the final whip of the cream, will lead you to a dessert that balances tradition with modern precision.
We hope this guide makes your next baking project a resounding success. If you enjoyed this walkthrough, try experimenting with different fruit variations once you’ve mastered the core method. As of 2026, we continue to see a resurgence in classic recipes that emphasize real, wholesome ingredients over shortcut mixes. Happy baking, and don’t forget to share your results with us here at Savor and Skillet!

Other Articles

German Apple Strudel Recipe: How to Make It Step by Step
Kartoffelpuffer Recipe: How to Make It

No Comment! Be the first one.