





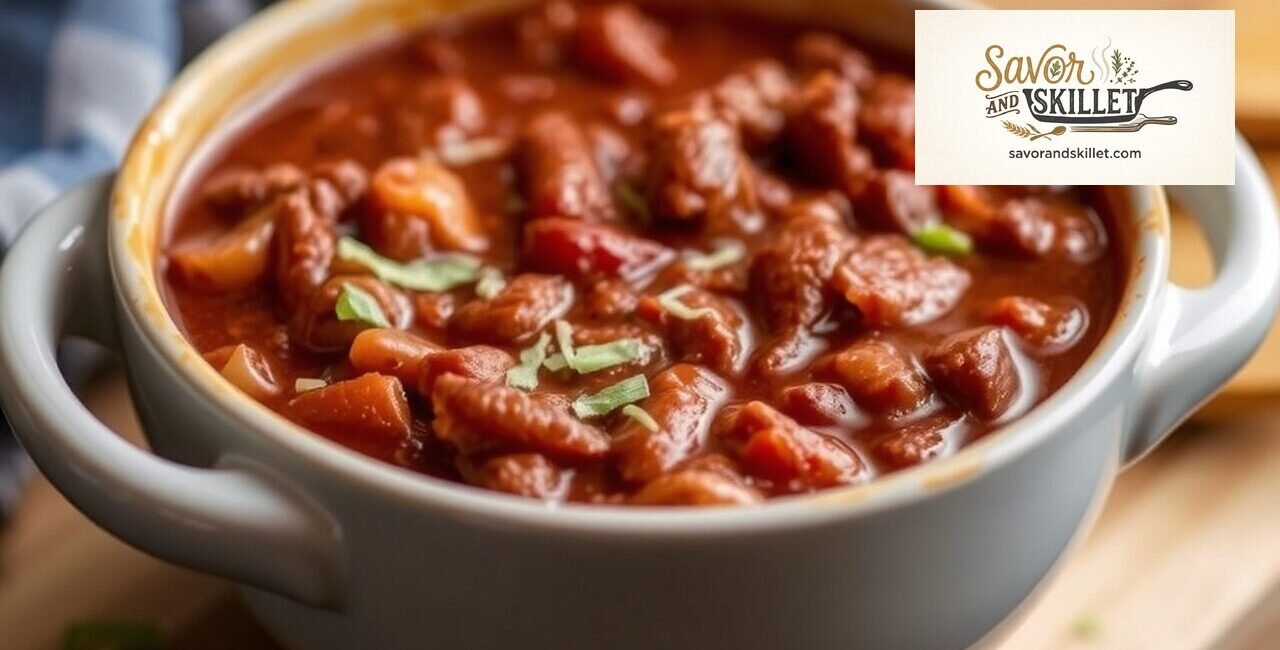
Welcome to Savor and Skillet, where we explore the heartiest, most flavorful dishes from around the world. Today, we’re diving into a true icon of American cuisine: Texas Chili. This isn’t just any bowl of chili; it’s a rich, robust, and utterly satisfying experience, packed with tender beef and a complex blend of chilies and spices. If you’ve ever dreamt of crafting the perfect bowl of “chili con carne” (chili with meat), then this is your definitive guide for 2026. Get ready to transform your kitchen into a chili haven and impress everyone with a dish that truly captures the spirit of the Lone Star State.
Also Read: Buttermilk Pancakes Recipe: How to Make It
What is Texas Chili?

Texas Chili is a robust, meat-centric stew famously devoid of beans and often tomatoes, focusing instead on tender chunks of beef slow-simmered in a rich, spicy sauce made from dried chiles, aromatics, and a signature blend of spices. Its flavor profile is deep and complex, with earthy notes from roasted chiles, a savory meat base, and a lingering warmth that builds rather than overwhelms. This dish is worth making for its incredibly satisfying texture and profound taste, offering a true taste of Texan culinary heritage that’s perfect for chilly evenings or game day gatherings.
Ingredients for Authentic Texas Chili

Now that we understand the essence of true Texas Chili, let’s gather what we need to bring this iconic dish to life. The ingredients are simple in their nature, but their preparation and combination are what elevate this chili to legendary status. This recipe is designed to yield a generous batch, perfect for feeding a crowd or enjoying leftovers throughout the week.
Recipe Card: Texas Chili
- Servings: 8-10 people
- Prep Time: 45 minutes (plus overnight soaking for chiles if desired)
- Cook Time: 3-4 hours
- Total Time: 3 hours 45 minutes – 4 hours 45 minutes
- Difficulty: Medium
Equipment You’ll Need:
- Large Dutch oven or heavy-bottomed pot (e.g., Le Creuset or Lodge)
- Cast iron skillet (for toasting chiles)
- Blender or food processor
- Cutting board and sharp knife
- Measuring cups and spoons
- Large mixing bowl
- Ladle
The Essential Ingredients:
- For the Chili Paste:
- 6-8 large dried ancho chiles (about 2 oz)
- 4-6 large dried guajillo chiles (about 1.5 oz)
- 2-3 dried arbol chiles (optional, for extra heat)
- 3 cups hot water or beef broth (for soaking)
- 1 tablespoon neutral oil (like canola or grapeseed)
- For the Beef:
- 3-3.5 lbs boneless beef chuck roast, trimmed of excess fat and cut into 1-inch cubes
- 1 tablespoon neutral oil
- 1.5 teaspoons kosher salt, divided
- 1 teaspoon freshly ground black pepper, divided
- Aromatics & Spices:
- 1 large yellow onion, finely chopped
- 6-8 cloves garlic, minced
- 2 tablespoons chili powder (high quality, like McCormick)
- 1 tablespoon ground cumin
- 1 teaspoon dried oregano (Mexican oregano preferred)
- 1/2 teaspoon cayenne pepper (or to taste)
- 1/4 teaspoon ground cloves (optional, for depth)
- Liquid & Thickener:
- 4 cups beef broth (low sodium)
- 1 (14.5 oz) can diced tomatoes (optional, for acidity and slight sweetness, use sparingly if you prefer traditional no-tomato Texas chili)
- 1/4 cup strong brewed black coffee or dark beer (e.g., Shiner Bock)
- 2 tablespoons masa harina (corn flour)
- 1/4 cup cold water (for masa slurry)
- Finishing & Garnish (Optional):
- Chopped fresh cilantro
- Diced red onion
- Shredded cheddar cheese
- Sour cream or Greek yogurt
- Jalapeño slices
- Cornbread (for serving)
Substitutions and Allergen Notes:
- Beef: While chuck roast is traditional for its marbling and tenderness when slow-cooked, you could use beef brisket or even boneless short ribs, though cooking times might vary. Avoid lean cuts as they won’t render the same depth of flavor.
- Chiles: If specific dried chiles are hard to find, a good quality chili powder blend can be a substitute, but the depth of flavor from rehydrated chiles is unparalleled. For a less spicy version, omit the arbol chiles.
- Masa Harina: This is a key thickener that also adds a subtle corn flavor. If unavailable, you can use a cornstarch slurry (1 tablespoon cornstarch mixed with 2 tablespoons cold water) for thickening, but it won’t add the same authentic flavor.
- Allergens: This recipe is naturally gluten-free if you use masa harina (check labels for cross-contamination) and omit wheat-based thickeners. It contains beef.
How to Make Texas Chili: Step-by-Step
With all our ingredients meticulously prepared, we’re ready to embark on the journey of cooking this magnificent Texas Chili. Mirdania always emphasizes the importance of patience and technique in recipes like this, as each step builds layers of flavor that contribute to the final, irresistible result.
- Prepare the Dried Chiles (Chili Paste):
- Heat a dry cast-iron skillet over medium heat. Toast the dried ancho, guajillo, and arbol chiles (if using) for 2-3 minutes, turning frequently, until fragrant and slightly pliable. Be careful not to burn them, as this will make them bitter.
- Remove the stems and seeds from the chiles. Place the toasted, deseeded chiles in a heatproof bowl. Pour 3 cups of hot water or beef broth over them, ensuring they are fully submerged. Let them soak for at least 30 minutes, or up to several hours, until they are softened and pliable.
- Once softened, transfer the chiles to a blender, reserving the soaking liquid. Add 1 tablespoon of neutral oil to the blender along with about 1 cup of the soaking liquid. Blend until you achieve a smooth, thick paste, adding more soaking liquid (1/4 cup at a time) as needed to reach the desired consistency. Strain the paste through a fine-mesh sieve into a bowl, pressing on the solids to extract as much liquid as possible, then discard the solids. This straining step ensures a silky-smooth chili.
- Brown the Beef:
- Pat the beef chuck cubes dry with paper towels. Season them with 1 teaspoon of kosher salt and 1/2 teaspoon of black pepper.
- Heat 1 tablespoon of neutral oil in your large Dutch oven or heavy-bottomed pot over medium-high heat until shimmering. Working in batches to avoid overcrowding, brown the beef cubes on all sides until deeply colored, about 5-7 minutes per batch. Overcrowding will steam the meat instead of browning it, preventing the development of a rich crust. Remove browned beef to a separate bowl and set aside.
- Sauté Aromatics & Bloom Spices:
- Reduce the heat to medium. Add the finely chopped yellow onion to the pot, scraping up any browned bits from the bottom (this is where flavor lives!). Sauté the onion for 6-8 minutes until softened and translucent.
- Add the minced garlic and cook for another 1-2 minutes until fragrant, being careful not to burn it.
- Stir in the chili powder, ground cumin, dried oregano, cayenne pepper, and optional ground cloves. Cook, stirring constantly, for 1 minute until the spices are very fragrant. This “blooming” step deepens their flavor.
- Build the Chili Base:
- Pour the strained chile paste into the pot with the aromatics and spices. Cook, stirring frequently, for 5-7 minutes until the paste darkens and thickens, indicating the flavors are concentrating. This is a crucial step for developing the chili’s depth.
- Stir in the remaining 1/2 teaspoon of kosher salt and 1/2 teaspoon of black pepper.
- Deglaze the pot with the beef broth, scraping the bottom vigorously to loosen any remaining browned bits. Add the optional diced tomatoes and the coffee or dark beer. Bring the mixture to a gentle simmer.
- Simmer the Chili:
- Return the browned beef cubes to the pot. Ensure the beef is mostly submerged in the liquid. Bring the chili back to a gentle simmer.
- Reduce the heat to low, cover the pot, and simmer for at least 2.5 to 3 hours, or until the beef is fork-tender and easily shreds apart. Stir occasionally to prevent sticking.
- Thicken with Masa Harina:
- In a small bowl, whisk together the masa harina and 1/4 cup cold water until smooth. This creates a masa slurry.
- Uncover the chili and stir in the masa slurry. Continue to simmer, uncovered, for another 15-30 minutes, stirring occasionally, until the chili has thickened to your desired consistency. The masa harina not only thickens but also adds a wonderful subtle corn flavor that’s traditional in Texas Chili.
- Taste and Adjust:
- Taste the chili and adjust seasoning as needed. You might want more salt, a pinch more cayenne for heat, or a dash of apple cider vinegar or lime juice for brightness if it feels flat. The flavors should be balanced, savory, and have a pleasant warmth.
- Let the chili rest off the heat for 10-15 minutes before serving. This allows the flavors to meld even further.
I imagine there are many readers from Mexico. So, for those of you who still find the written tutorial a bit unclear, you can definitely watch the video tutorial below:
Chef’s Tips for the Best Texas Chili
Since you now understand the meticulous steps involved in crafting the perfect Texas Chili, let’s dive into some expert tips that elevate your creation from good to unforgettable. These are insights Mirdania has gleaned from countless culinary explorations, designed to help you master this dish.
- Quality of Beef Matters: Don’t skimp on the chuck roast. Its marbling is crucial for tender, flavorful results. Cutting it into uniform 1-inch cubes ensures even cooking. Some purists even grind their own chuck roast for a unique texture, but cubes are more traditional for “chili con carne.”
- Don’t Rush the Chile Toasting: Toasting dried chiles awakens their essential oils and deepens their smoky, fruity notes. However, burning them makes them bitter. Watch them closely and toast just until fragrant.
- Patience with the Simmer: The magic of Texas Chili happens during the long, slow simmer. This is when the tough collagen in the chuck roast breaks down into gelatin, creating that melt-in-your-mouth tenderness and enriching the chili’s body. An Instant Pot can speed up the cooking process significantly if you’re short on time, but for traditional depth, the Dutch oven on low heat is king.
- Balance the Heat: The beauty of making your own chili paste is controlling the heat. Adjust the amount of arbol or cayenne chiles to your preference. Remember, you can always add more heat, but it’s hard to take it away.
- Embrace the Masa Harina: Beyond just thickening, masa harina imparts a subtle, earthy corn flavor that is a hallmark of authentic Texas Chili. Don’t skip it; it’s what gives the chili its characteristic texture and taste.
- Resting is Key: Like many stews and braises, chili benefits immensely from resting. A short rest allows the flavors to deepen and meld, making each spoonful even more delicious. In fact, Texas Chili often tastes even better the next day!
Common Mistakes and How to Fix Them
With “How to Make Texas Chili” under your belt, it’s worth addressing some pitfalls that home cooks sometimes encounter. Understanding these common mistakes, and more importantly, how to fix them, will ensure your Texas Chili turns out perfectly every time.
- Mistake: Overcrowding the Pot when Browning Beef.
- Fix: This leads to steamed, grey meat rather than beautifully browned, flavorful crusts. Always brown your beef in batches, ensuring there’s enough space for the pieces to sear properly. Patience here pays off immensely in flavor development.
- Mistake: Burning the Dried Chiles.
- Fix: Burned chiles will make your chili taste acrid and bitter. Toast them in a dry pan over medium heat for only 1-2 minutes until fragrant and slightly pliable, then remove them immediately. If you accidentally burn them, it’s best to discard and start fresh with a new batch.
- Mistake: Not Skimming Excess Fat (if using very fatty beef).
- Fix: While fat contributes flavor, too much can make the chili greasy. After browning the beef and sautéing onions, if there’s an excessive amount of rendered fat, carefully spoon out some of it before adding the chili paste and liquids.
- Mistake: Adding Too Many “Fillers” (like beans or excessive tomatoes).
- Fix: True Texas Chili is all about the meat and chili sauce. While a small amount of diced tomatoes is sometimes used for acidity, avoid large quantities or canned crushed tomatoes if aiming for authenticity. And for the love of Texas, no beans! If you love beans, make a different kind of chili.
- Mistake: Not Simmering Long Enough.
- Fix: The beef chuck needs ample time to break down and become fork-tender. If your beef is tough, simply continue simmering, covered, on low heat. It’s almost impossible to overcook the beef in this scenario; it will just get more tender.
- Mistake: Under-seasoning.
- Fix: Taste, taste, taste! As the chili simmers and reduces, flavors concentrate, but you might need to adjust salt, heat, or acidity at the end. A splash of lime juice or a tiny bit of apple cider vinegar can brighten the flavors if they seem a little flat.
Serving, Storage, and Reheating Your Texas Chili
We just unpacked the common pitfalls and their solutions, so now let’s think about how to best enjoy the fruits of your labor and make sure every bowl is as delicious as the first. Proper serving, storage, and reheating are crucial for maximizing the enjoyment of your Texas Chili.
Serving Suggestions:
Texas Chili is a meal in itself, but it truly shines with a selection of classic toppings. Encourage your guests to customize their bowls!
- Classic Toppings: A sprinkle of shredded cheddar cheese, a dollop of sour cream or Greek yogurt, and a handful of fresh chopped cilantro are always winners. Diced red onions or thinly sliced jalapeños add a fresh, pungent bite.
- On the Side: Warm cornbread, particularly a slightly sweet version, is the perfect accompaniment for soaking up all that rich chili sauce. Crackers or Fritos corn chips also make excellent crunchy additions.
- Beverage Pairings: A robust dark beer or a glass of Zinfandel pairs beautifully with the rich, spicy flavors of the chili. For a non-alcoholic option, a cold glass of sweet tea hits the spot.
Storage:
One of the best things about Texas Chili is that it often tastes even better the next day as the flavors continue to meld and deepen.
- Refrigeration: Allow the chili to cool completely before transferring it to airtight containers. It can be stored in the refrigerator for up to 3-4 days.
- Freezing: Texas Chili freezes exceptionally well. Portion cooled chili into freezer-safe containers or heavy-duty freezer bags (lay bags flat for efficient storage). It can be frozen for up to 3 months. Thaw overnight in the refrigerator before reheating.
Reheating:
- Stovetop: The best way to reheat chili is gently on the stovetop. Transfer the desired amount to a saucepan and heat over medium-low heat, stirring occasionally, until heated through. Add a splash of beef broth or water if it seems too thick.
- Microwave: For individual servings, microwave in a microwave-safe bowl, stirring every minute, until hot. Be careful not to overheat, which can toughen the meat.
Frequently Asked Questions About Texas Chili
After covering the proper ways to serve, store, and reheat your delicious Texas Chili, it’s natural to have a few more questions. Here, we address some common queries that often arise when tackling this classic dish.
What is the main difference between Texas Chili and other chilies?
The main difference is the strict exclusion of beans and, typically, large amounts of tomatoes, making Texas Chili a meat-focused stew where the beef and a complex sauce derived from dried chiles are the stars. Other chili varieties often include beans, various vegetables, and tomato bases.
Can I make Texas Chili in a slow cooker?
Yes, you can absolutely adapt this Texas Chili recipe for a slow cooker. After browning the beef and sautéing the aromatics and chile paste on the stovetop as instructed, transfer everything to your slow cooker. Add the remaining liquids, cover, and cook on low for 6-8 hours or on high for 3-4 hours, until the beef is fork-tender. Stir in the masa harina slurry during the last 30-60 minutes of cooking.
Why are there no beans in traditional Texas Chili?
Historically, “chili con carne” was a simple dish of meat simmered with chiles, without the addition of beans. The tradition dictates that the focus should remain solely on the beef and the rich, spicy chili sauce, maintaining a distinct identity from other chili styles that evolved with beans as a common filler.
What kind of dried chiles are best for Texas Chili?
For authentic flavor, a combination of ancho and guajillo chiles is highly recommended, with arbol chiles for added heat if desired. Anchos provide a smoky, sweet, and mild heat, while guajillos offer a fruity, tangy profile. This blend creates a balanced and complex chili paste.
Can I make this chili less spicy?
To make your Texas Chili less spicy, simply reduce or omit the arbol chiles and cayenne pepper. The ancho and guajillo chiles provide foundational flavor with minimal heat, so focusing on those while adjusting the hotter elements will allow you to control the spice level to your preference.
Conclusion
We’ve journeyed through the rich history and detailed preparation of Texas Chili, from understanding its distinct character to mastering the art of the chile paste and achieving that coveted fork-tender beef. Mirdania hopes this guide from Savor and Skillet empowers you to create a truly exceptional bowl of chili, rich in flavor and tradition. This isn’t just a recipe; it’s an invitation to savor a piece of culinary heritage that warms the soul and delights the palate. So, roll up your sleeves, gather your ingredients, and commit to crafting this magnificent dish. We’re confident that by following these steps, your 2026 Texas Chili will be a resounding success. Happy cooking!

Other Articles

White Chicken Chili Recipe: How to Make It
How to Make Beef Chili: Recipe and Instructions

No Comment! Be the first one.