



Savor and Skillet – How to Hold and Use a Chef’s Knife Safely. Have you ever watched a professional chef prep a mountain of vegetables in seconds and wondered how they do it without losing a finger? Many home cooks assume it’s all about raw speed, but the secret actually lies in technique. If you want to master the kitchen, learning how to hold and use a chefs knife safely is the single most important skill you can acquire in 2026. Whether you are a total beginner or just looking to refine your prep work, understanding the physics of your blade will transform your cooking. Let’s break this down step by step so you can work with confidence and precision.
Also Read: How to Clean an Air Fryer Safely
The Fundamentals: Why Proper Knife Mechanics Matter
hold and use a chefs knife safely is the practice of utilizing a balanced pinch grip and a consistent, rhythmic motion to cut ingredients while maintaining full control of the blade. By stabilizing the knife at the bolster and using a guided motion, you minimize the risk of slips and ensure uniform cuts, which is essential for even cooking and professional presentation.
According to safety reports from the National Safety Council, a significant portion of kitchen-related lacerations occur when users attempt to force a dull blade through tough produce or use an unstable, “dagger-style” grip. When you hold your knife correctly, you aren’t just protecting your skin—you are increasing your efficiency. At Savor and Skillet, we often emphasize that gear is only as good as the hand wielding it. If you master the grip, you’ll find that even an entry-level forged blade feels like an extension of your own hand.
The Pinch Grip: Your Primary Point of Control
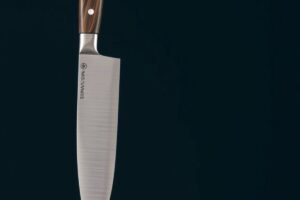
Most beginners make the mistake of wrapping all four fingers around the handle like they are gripping a hammer. This “hammer grip” offers zero control over the tip of the knife. Instead, place your thumb and index finger on the blade itself, right where the metal meets the handle (the bolster). Wrap your remaining three fingers around the handle. This pinch grip turns the knife into a pivot point, allowing you to move the blade with your shoulder rather than your wrist, which is a major factor in preventing fatigue during long prep sessions.
The Guiding Hand: Creating a Protective Barrier
Once you have secured your grip, your non-dominant hand—the “guiding hand”—becomes the secret to safety. Instead of laying your fingers flat against the produce, you should use the “claw” technique. Curl your fingertips inward toward your palm, using your knuckles to act as a guide for the side of the blade. Because your fingernails are tucked behind the knuckles, the sharp edge of the knife can ride against your knuckles without ever touching your skin. It feels counterintuitive at first, but with practice, this physical barrier becomes muscle memory.
Moving from the Pinch Grip to the Cutting Motion
Now that we’ve covered the fundamental mechanics of the pinch grip and the claw, let’s dive into how to translate that stability into a fluid cutting motion. Many people try to “chop” by lifting the knife high into the air and bringing it down with force, but that is actually the most dangerous way to work in the kitchen. Efficient, safe cutting is all about maintaining contact between the blade and the cutting board.
The Rock-Chop Technique
The rock-chop is the gold standard for versatility. With the tip of your chef’s knife resting on the cutting board, you use a rhythmic rocking motion to slice through herbs, garlic, or onions. Because the tip never leaves the board, the knife cannot wander, significantly reducing the chance of a slip. This technique is incredibly effective for delicate aromatics and is a favorite among professional culinary instructors because it minimizes the travel distance of the blade, keeping your workspace contained and organized.
The Sliding Slicing Motion
Sometimes you need to tackle larger items like a thick piece of squash or a dense roast. For these tasks, the rock-chop won’t suffice. Instead, utilize a sliding motion. Rather than forcing the blade downward, pull the knife backward toward you or push it forward while applying light pressure. According to culinary guidelines provided by The Culinary Institute of America, a sharp knife that slides through produce requires less downward force, which is the primary cause of accidental slips. Always ensure your knife is properly honed to facilitate this glide; a dull knife is arguably more dangerous than a sharp one because it encourages the user to press harder than necessary.
Establishing a Safe Environment
Handling a knife can certainly be tricky—and even dangerous—if you don’t know the proper techniques. To give you a more comprehensive learning resource, I’m including not just written information but also a video titled “9 Essential Knife Skills To Master | Epicurious 101” from Epicurious, a renowned name in the culinary world.
Without further ado, here is the video, which you can watch for free right here on the Savor and Skillet website:
Since you now understand the nuances of the rock-chop and the sliding motion, here is how the physical environment connects—and why it matters just as much as your technique. You could have perfect form, but if your station is a disaster, your safety is compromised. A cluttered board or an unstable base is a recipe for an accident, regardless of how well you know how to hold and use a chefs knife safely in a controlled setting.
The Importance of Board Stability
Never place a wooden or plastic cutting board directly onto a slick granite or laminate countertop. If your board moves while you are mid-slice, your blade will move with it. Place a damp kitchen towel or a silicone mat underneath your board to create a non-slip surface. This is a common oversight even in some commercial kitchens, but it is a “pro” habit that takes seconds to implement. If your board feels solid, your confidence in your knife work will naturally skyrocket.
Lighting and Workspace Management
In the high-paced kitchens of 2026, we are seeing a shift toward better-lit prep zones. You cannot safely maneuver a blade if you are working in a shadow. Ensure your prep area is well-illuminated, and keep your workspace clear of extraneous ingredients or tools that could interfere with your arm movement. If you are prepping multiple items, move them to the side of the board rather than keeping them near your cutting path. At Savor and Skillet, we always suggest organizing your “mise en place” before you even touch the knife; it keeps your focus on the blade, not on where your next onion is hiding.
Maintenance for Longevity and Safety
After covering the environmental factors that contribute to a safe prep station, the obvious next question is: what about the gear itself? Maintaining your equipment is the hidden variable in safety. A knife is a precision tool, and treating it as such is the difference between a clean cut and a kitchen disaster. We’ve seen many home cooks struggle simply because their edge geometry has been compromised by improper storage or neglect.
Honing vs. Sharpening: Know the Difference
You should hone your knife regularly to keep the edge aligned, but reserve sharpening for when the blade can no longer bite into a tomato skin. A honing steel (often found in sets from brands like Wüsthof or Shun) realigns the microscopic teeth on the edge of your blade. When these teeth bend, the knife feels dull, causing you to press harder. By honing your blade every few uses, you maintain the “factory feel” of the edge, which is essential to keeping your work consistent and safe.
Safe Storage Solutions
Throwing a chef’s knife into a cutlery drawer is a safety hazard for anyone reaching into that drawer later, and it’s a death sentence for your blade’s edge. Use a magnetic wall strip or an in-drawer wooden block. By keeping the blade isolated, you ensure that you aren’t grabbing an unexpected sharp edge, and you prevent the blade from knocking against other metal utensils. This simple habit keeps your tool in top condition for years, protecting your investment as much as your fingers.
Frequently Asked Questions About hold and use a chefs knife safely
Can I use a chef’s knife if I am left-handed?
Yes, absolutely. While most knives are sharpened with a 50/50 bevel, the grip and guiding hand techniques remain the same, just mirrored.
What should I do if the knife starts to slip?
Stop immediately and evaluate your board stability and grip pressure. If a slip occurs, resist the urge to catch the knife; let it fall to the floor and step back, as trying to grab a falling blade often leads to the most severe injuries.
Is a larger knife more dangerous for beginners?
Actually, a larger, well-balanced 8-inch chef’s knife is often safer than a small paring knife. A larger blade provides more surface area for the claw grip and is less prone to “stuttering” through thick vegetables.
How often should I sharpen my knife for safety?
You should hone your knife before every major cooking session and have it professionally sharpened or use a whetstone every 6 to 12 months, depending on usage. A sharp knife is inherently safer than a dull one because it requires less force to cut.
Are there specific knives that are “safer” to use?
Look for knives with a bolster and a comfortable, ergonomic handle that fits your hand size. Brands like Victorinox are often recommended for beginners because they are lightweight and have a very forgiving blade profile that is easy to control.
Mastering the Craft
With the information about maintenance and storage now clear, you are well on your way to mastering the art of the blade. We’ve covered everything from the precision of the pinch grip to the importance of a stable board, all designed to help you hold and use a chefs knife safely in 2026. Remember that technique is not built in a day; it is built in every slice of an onion, every chopped herb, and every meal prepared with intent.
Consistency is your best friend. Start by practicing your grip on soft produce like cucumbers or bell peppers before moving to more difficult items like carrots or winter squash. As you continue your culinary journey, you will find that the knife becomes less of an intimidating tool and more of a reliable companion in your kitchen. I hope this guide from Savor and Skillet helps you approach your next meal with total confidence. If you found these tips helpful, please share this article with your cooking friends or leave a comment below with your own favorite knife-work hack! See you in the next article! — Mirdania, Savor and Skillet

Other Articles

How to Choose Ripe Avocados, Tomatoes, and Melons
How to Choose the Right Kitchen Knife Size
No Comment! Be the first one.